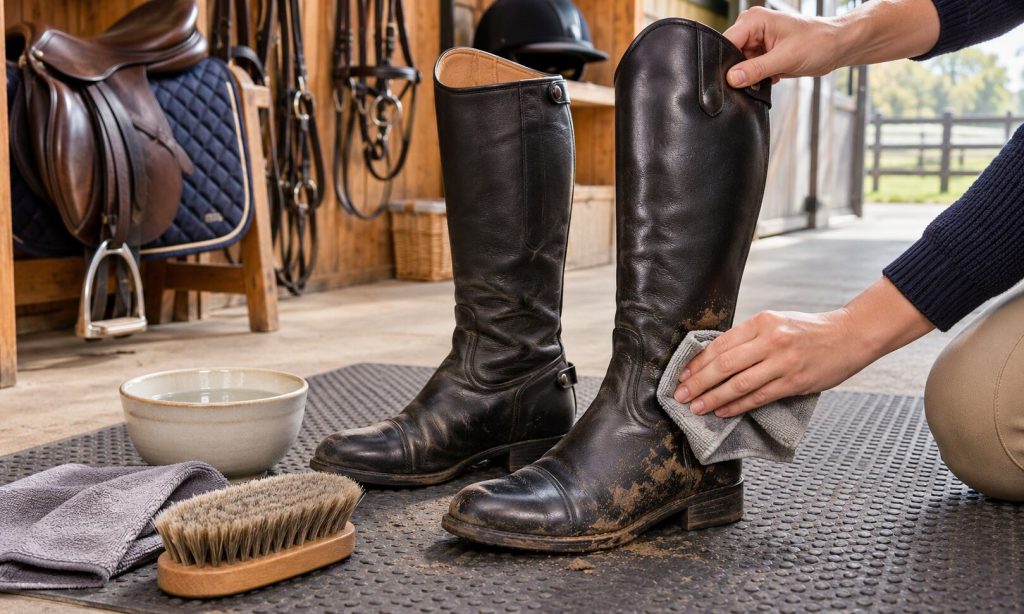
Learning how to clean horse riding boots for beginners and keep them in good condition is a small habit with real benefits. Mud, sweat, and arena dust collect around soles, zippers, seams, and heels. Left there, grime can make footwear uncomfortable and harder to inspect. But riding boots are not all made from the same material. Leather, synthetic uppers, suede panels, and rubber sections require different care.
This guide covers an easy after-ride routine, deeper cleaning when appropriate, careful drying, safe storage, and the warning signs that boots need repair or replacement. Our best horse riding boots for beginners article explores footwear types and fit; this one focuses on caring for the pair you already own. Keep the manufacturer’s material and care directions handy. Never soak leather or apply a chemical merely because it worked on another boot.
Know Your Boot Material Before Cleaning
The first step in how to clean horse riding boots for beginners is identifying what touches the water and cleaner. Traditional leather can dry out or discolor with aggressive washing. Synthetic panels may tolerate a damp wipe but can still be damaged by heat or harsh solvents. Suede and nubuck need particularly cautious handling. Rubber soles and smooth outer surfaces often collect most of the mud.
Read the care label or documentation for your exact footwear. If material details are unclear, test any suitable cleaner on a small inconspicuous area first. Avoid improvised mixtures of bleach, detergent, polish, and conditioner. For how to clean horse riding boots for beginners, begin with the gentlest approach. A basic cleaning kit can be as simple as a soft brush, two clean cloths, cool water, and a dry ventilated place. The goal is to remove dirt without weakening the boot.
Leather, Synthetic, and Combination Boots
Smooth leather generally benefits from gentle surface cleaning and an appropriate conditioning plan when the maker permits it. Synthetic uppers may need only mild cleaning and air drying. Combination designs demand attention to the most delicate component, including glued joins or fabric linings. Take extra care around decorative stitching, stretch inserts, and zippers. If you are unsure whether an oil or wax is compatible, skip it until you confirm.
A Practical Cleaning Routine After Every Ride
How to clean horse riding boots for beginners should start before mud hardens. Learning how to clean horse riding boots for beginners also means checking the sole before the next ride. Set the boots on a stable mat in a well-lit area. Remove loose dirt from the soles and heels with a soft brush, taking care not to scratch the upper. Knock soil from deep grooves gently rather than using sharp tools. Wipe visible dirt from the outside with a lightly damp cloth.
Use a second clean cloth to lift remaining moisture and grime. Do not flood a zipper, stitch line, or leather panel. If mud is thick, allow it to soften slightly with a damp cloth and remove it in stages. Keep wet cleaning modest, especially on materials whose care instructions discourage water. This routine usually takes only a few minutes and makes emerging damage easier to notice.
Step 1: Remove Dried Dirt Without Scraping
Brush from cleaner areas toward muddy areas so debris does not spread across the boot. Clean the welt, heel edge, and sole with gentle strokes. Check the recess around the heel, where grit may lodge. Do not use a wire brush on leather or a knife between seams. Those shortcuts can damage the materials faster than the original dirt would.
Step 2: Wipe the Upper and Closure
Use a cloth moistened according to the material’s instructions. Pay attention to the toe, ankle creases, zipper track, and the back of the calf. Do not yank a stuck zipper. Remove visible grit around the teeth with a soft brush, then try the closure gently. If it continues catching, have it assessed or repaired instead of forcing it.
Step 3: Dry Gradually
Blot off water and leave the boots upright in a ventilated area, away from direct heaters, open flames, intense sun, and hot air. Excessive heat can damage leather and adhesives. Remove removable insoles if the instructions allow it. Avoid sealing damp boots inside a bag. Stuffing the shaft with clean paper or using a suitable boot shaper can help maintain form without stretching it.
Deep Cleaning Without Ruining Fit or Finish
Occasional deeper cleaning may be appropriate after a very muddy lesson, but follow the boot maker’s guidance. A material-compatible cleaner should be applied sparingly with a suitable soft cloth or brush. Remove residue as directed and allow the boot to dry thoroughly before any approved conditioning. Do not assume that more foam or a stronger scent means better cleaning.
An important part of how to clean horse riding boots for beginners is understanding what cleaning cannot repair. A cracked heel, loose sole, split seam, failed zipper, or worn tread needs evaluation. Polish can improve appearance but cannot restore a damaged structural component. Riding footwear affects how your foot sits in a stirrup, so functional condition matters at least as much as shine.
When to Condition Leather
If the manufacturer’s directions call for conditioner, use a small amount of the compatible product at the recommended interval. Overapplication may leave residue and sometimes change how the material feels. Keep any treatment away from areas the maker identifies as unsuitable. Let the boot absorb and dry as directed before riding. A finish that looks glossy is not proof of better protection.
What About Disinfecting Boots Between Barns?
Cleaning and disinfection are different. Disease-control rules may require removing visible organic material before applying a designated disinfectant. However, some disinfectants damage leather or fabric. Follow the stable’s biosecurity policy and veterinary guidance rather than spraying every riding boot indiscriminately. A separate cleanable overboot or dedicated barn footwear may be more practical when a facility requires disinfection. Never mix disinfectants.
Check the Safety Features Every Time
When considering how to clean horse riding boots for beginners, take a moment to inspect their riding function. The University of Missouri Extension notes that suitable footwear and stirrup use are important parts of riding safety. Check the heel, sole condition, fastening, and overall fit. Dirt removal should make these details visible, not distract from them. A polished boot with a loose heel is still a problem.
A boot that has stretched, slips excessively, or presses painfully may need attention. The footwear also must work with the stirrup and discipline, as a broad or heavily treaded sole may behave differently from a smooth riding sole. If you are still learning your position and equipment, our beginner horse-riding safety guide offers related basics. Ask your instructor to check questionable footwear before mounting.
Inspect Heels, Soles, and Zippers
Look for a heel that is securely attached and a sole that has not peeled away. Check for deep cracks or sections that catch on equipment. Open and close fasteners slowly to find any snag. Compare both boots for uneven wear. If a defect could affect release from the stirrup or stable footing, stop using the boots until it is corrected or the pair is replaced.
Store Riding Boots So They Keep Their Shape
How to clean horse riding boots for beginners does not end when the cloth is put away. Store the boots dry, upright, and away from excessive heat and sunlight. A ventilated location helps prevent musty smells and moisture damage. Keep them off a wet floor and away from manure, chemical splashes, and damp tack piles. Use shapers where the design allows them.
Let wet footwear dry before placing it in a closed locker or travel bag. Check the lining and insoles for trapped moisture after long rides. Maintain a simple schedule: quick wipe after each use, more detailed cleaning when soiled, and regular inspection for wear. FYI, even a sturdy boot does not enjoy spending the weekend in a sealed bag full of arena grit.
Care When Traveling to Lessons
Carry clean boots separately from dirty grooming tools. A breathable boot bag or clean protective cover can help keep surfaces from rubbing. Avoid piling heavy tack on top of tall shafts. Once home, unpack promptly to let residual moisture escape. If you ride Western as well as English, remember that different footwear designs may need different cleaning and fit checks; our cowboy riding boot overview discusses that footwear category.
Frequently Asked Questions
Beginners often worry about ruining new boots while trying to keep them clean. How to clean horse riding boots for beginners becomes simpler once you identify the material. Start with the least aggressive material-compatible method, then work slowly. These answers address the most common care questions.
If a boot has structural damage or no longer fits safely, cleaning alone is not enough. Ask a qualified repair professional or your riding instructor whether continued riding is appropriate.
Can I wash leather riding boots in a washing machine?
Generally, avoid it unless the maker explicitly permits machine washing. Immersion and agitation can damage leather, lining, shape, and adhesives.
How should I dry boots after rain?
Blot excess water and air-dry in a ventilated place away from direct heat. Remove removable insoles only if appropriate for the design.
How often should I condition leather boots?
Follow the specific care instructions and material condition. Conditioning too often or using incompatible products may leave residue or alter finish.
Is ordinary household bleach safe for riding boots?
Do not use it as an everyday cleaner. It may damage materials and creates chemical risks. Follow any barn biosecurity directions carefully.
When should beginners replace riding boots?
Replace or repair them when heels, soles, closures, or fit can no longer support safe use. Persistent discomfort is another reason to reassess.
Final Words
Learning how to clean horse riding boots for beginners and keep them in good condition is mostly about gentle, consistent care. Remove dirt after rides, match cleaning methods to the material, dry boots slowly, and store them where air can circulate. Inspect the heel, sole, zipper, and fit each time. Good maintenance helps you notice safety issues before the next lesson.
If you are deciding what footwear style suits your first lessons, revisit our best horse riding boots for beginners guide for context. For the pair you already wear, follow its own care instructions and ask your instructor about any defect that could affect riding. A clean boot should also remain a safe boot.