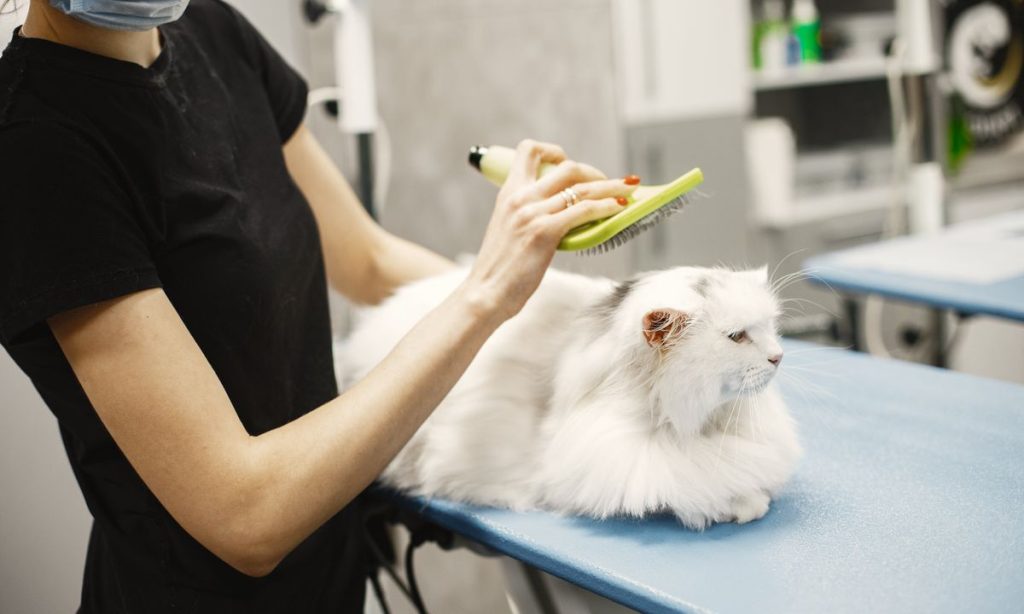
Common setup and adjustment problems with brushes often begin before a brush touches your cat. An uncomfortable grip, a poor brushing angle, or trapped fur can turn routine grooming into a struggle. Long coats make errors especially noticeable because hidden tangles catch the tool. Owners investigating brushes for long hair cats should understand safe handling as well as brush design. A few simple checks can help protect delicate skin and make the session calmer.
This guide addresses setup errors, pressure adjustments, coat snags, and cleaning. It explains when to stop rather than force the brush and when professional help is safer. You will learn how to inspect equipment, prepare a secure area, and respond to uncomfortable behavior. Comfort matters more than an immaculate finish, and short sessions can be more productive than prolonged grooming.
Prepare the Tool and a Secure Grooming Area
Common setup and adjustment problems with brushes include bent pins, a loose handle, a worn brush pad, and the wrong tool for the coat. Inspect every brushing surface for sharp edges or broken tips before use. Remove accumulated hair and check that detachable heads remain secure. Test your grip and wrist position without touching the cat. A brush that twists unexpectedly can tug painfully on even a small knot. Replace damaged equipment rather than trying risky repairs on parts that contact the skin.
Choose a quiet, well-lit area with secure footing. A nonslip towel on the floor can help, while a high surface introduces a fall risk. Keep the tool, comb, and reward nearby so you need not leave the cat unattended. Introduce the brush for sniffing rather than restraining the animal. Notice any loud noises, curious children, or other pets that may interrupt the session. For the overall sequence, see safe brushing methods for long-haired cats. Good preparation prevents many unnecessary struggles.
Adjust Brushing Pressure and Direction
A major cause of common setup and adjustment problems with brushes is pressure that makes the pins dig into skin. Start with light strokes following the direction of coat growth. Support the surrounding skin near a small tangle to minimize pulling. With a long coat, lift manageable layers rather than scraping across the visible topcoat repeatedly. A cat’s coat can look smooth on the surface while knots remain underneath. Never drag a brush through resistance; stop and inspect the area before choosing another gentle approach.
Keep the brush head stable and avoid sharply bending your wrist. Move your body to reach a different angle instead of twisting the cat into position. Work especially cautiously near armpits, belly, tail base, and behind the ears. Thin skin or underlying tenderness can make these places uncomfortable. Avoid eyes, inside ears, and genital areas altogether. The right pressure removes loose hair without leaving redness or causing flinching, freezing, vocalizing, or attempts to escape. If these signals appear, stop and reassess.
Handle Mats and Snags Without Injuring Skin
A snag means stop, not pull harder. Common setup and adjustment problems with brushes become dangerous when dense matting is mistaken for ordinary loose undercoat. Check a tangle only if the cat permits handling. Small loose knots may separate with patient finger work, but tight mats can pull continuously on skin and conceal wounds. Do not make repeated strokes over a stubborn knot. Aggressive deshedding devices and sharp-edged tools can cause injury if used incorrectly, particularly around fragile or inflamed skin.
Never cut a mat with household scissors. Feline skin is flexible and can be pulled into the mat, making accidental cuts surprisingly easy. A veterinarian or experienced cat groomer should assess dense, close-to-skin mats. If your cat reacts painfully when one area is touched, stop grooming that area. The between-session long-haired cat care guide explains regular checks that can help you notice tangles earlier. Prevention is preferable to a painful rescue session.
Respond to Stress and Grooming Resistance
Not every problem originates in the tool. Some cats dislike the sound of a brush, the handling position, or a session that lasts too long. Watch ears, tail movement, posture, breathing, and efforts to leave. A frozen body does not necessarily mean acceptance. Offer one or two gentle strokes in a favored area, then pause or reward calm participation. Build tolerance gradually over several days rather than using force to meet a grooming target. Cats should always have a safe way to leave.
Schedule brushing when your cat is naturally relaxed and avoid starting directly after a startling event. If a cat accepts only a few strokes, end on that positive note. Use a consistent sequence and let familiar scents remain around the grooming spot. The low-stress cat grooming routine provides additional handling ideas. FYI, a brush that works well on one cat may feel unpleasant to another. Coat density, age, temperament, and pain can change the experience.
Clean and Maintain Your Brush Between Sessions
Common setup and adjustment problems with brushes often return when trapped hair, grime, or damaged pins are ignored. Remove fur after each session without bending the bristles. Follow the maker’s cleaning method for the materials involved and rinse away any permitted residue. Dry the tool completely before storing it. Avoid soaking wooden handles or parts that are not designed for immersion. Reinspect pins, pads, seams, and attachments once dry; a tool can become rough with ordinary wear even if it originally felt smooth.
Store the brush in a clean, dry drawer or covered container away from cleaning chemicals and litter supplies. Prevent children and pets from playing with sharp-tipped grooming tools. Avoid sharing unclean tools between animals, especially when a skin infection is suspected. Record which areas your cat enjoys being brushed and which spots provoke discomfort. If a previously tolerant cat suddenly resists, do not assume the brush is the only issue. New pain, inflammation, or parasites can warrant veterinary evaluation.
Frequently Asked Questions
These common questions help distinguish equipment errors from coat problems. An adjustment that works on one cat may not work on another.
When a knot hurts, a tool appears damaged, or the skin looks abnormal, pause grooming. A veterinarian or experienced groomer can help decide what is safe.
Why does the brush catch on fur?
It may be catching a knot, moving against coat growth, or reaching past loose hair. Stop and check gently instead of pulling.
Can extra pressure remove more undercoat?
Extra pressure may irritate skin and worsen tangling. Adjust technique or seek professional coat care when routine brushing cannot remove the tangle.
How often should I clean a brush?
Remove trapped hair after every grooming session. Wash when appropriate for the tool, dry fully, and inspect its working surfaces before reuse.
What if a cat suddenly refuses brushing?
Stop and look for pain, mats, wounds, or changes in behavior. Ask your veterinarian if the change is unexplained or persists.
Should I cut out a tight mat?
No. Cat skin can stretch inside a mat. A veterinarian or qualified groomer should address mats close to the skin.
Final Words
Common setup and adjustment problems with brushes are easier to prevent than fix midway through a tense grooming session. Inspect the equipment, create a stable setting, use gentle strokes, and respond to resistance by stopping. Routine cleaning and pin checks reduce the chances of avoidable snagging. Do not judge success by how much loose fur you remove; a comfortable cat and healthy coat are better measures.
If you care for a long-haired cat, compare brushes for long hair cats with the safe technique guidance above. Adjust slowly to your own cat’s reactions. Contact a professional when mats sit close to the skin, brushing causes pain, or a sudden behavior change suggests illness. Safe grooming is a series of small decisions rather than a test of endurance.