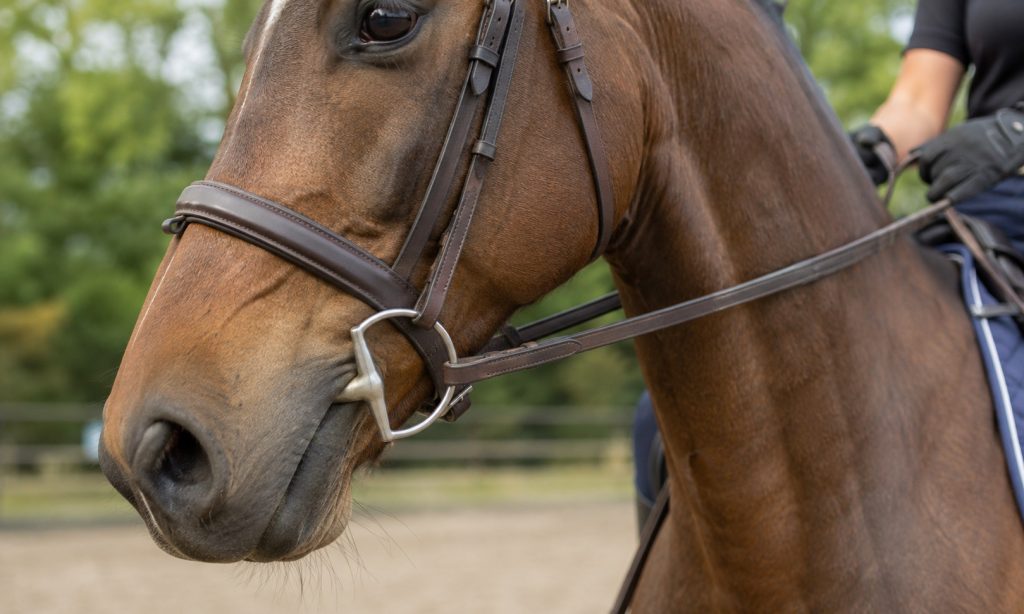
A horse bit sits in a sensitive part of the bridle, so a quick rinse after riding is only one part of good care. Dirt, saliva, and residue can collect around joints, rings, and crevices. Wear may create rough spots or loose parts that are hard to notice until the bit is cleaned and inspected closely. Materials also differ: a method that is suitable for one metal or mouthpiece may damage another. Before changing your routine, identify the bit’s material and check any care instructions. If you are researching a bit for a horse heavy on the forehand, remember that cleaning cannot correct fit or training concerns. This guide covers safe everyday cleaning, inspection, storage, and signs that a bit should be removed from use.
Identify the bit material first
Look for the maker’s information or ask a knowledgeable tack professional to identify the mouthpiece and fittings. Bits can include stainless steel, copper-containing alloys, sweet iron, rubber, synthetic materials, or combinations. Some metals naturally change color with use. A change in appearance alone does not tell you whether a bit is safe; pitting, flaking, sharpness, cracks, or a rough surface are more concerning.
Do not assume every bit can be scrubbed with the same tool or household cleaner. Public rider discussions offer conflicting suggestions, including abrasive pads and acidic soaks. These are personal recommendations, not universal care instructions, and can damage some surfaces or make defects harder to assess. Avoid steel wool, harsh acids, bleach, strong disinfectants, or a dishwasher unless the manufacturer specifically says that method is suitable.
If you cannot identify the material or the bit has a coating, painted surface, leather component, or unusual joint, ask the manufacturer, a qualified tack professional, or your veterinarian before using a cleaner. A safe routine should remove residue without altering the surface or leaving chemicals where the horse’s mouth will contact them.
Clean the bit after each use
Rinse off saliva and debris
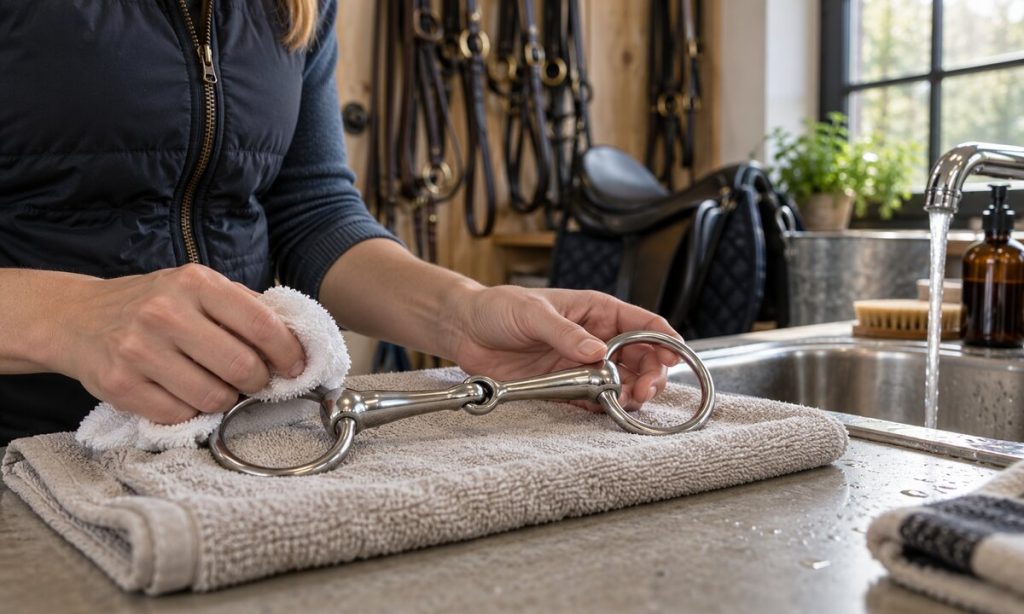
Remove the bit from the bridle and rinse it promptly with clean water. Use your fingers or a soft cloth to clear saliva and feed from the mouthpiece, joints, rings, and other crevices. A soft toothbrush can help reach tight areas if it does not scratch the material. Check both sides of the mouthpiece rather than cleaning only the visible outer surface.
Use mild soap only when needed
If water does not remove residue, use a small amount of mild soap only if the bit’s care instructions permit it. Work gently, then rinse thoroughly until no soap remains. Do not leave the bit soaking unless the material-specific instructions recommend it. Abrasive pads and metal tools can scratch the surface and create places where residue collects.
Dry fully before storing
Dry the bit with a clean towel, including joints and crevices. Let it air-dry completely before attaching it to leather or storing it in an enclosed tack box. Moisture trapped around metal fittings can contribute to corrosion, while a wet bit stored against leather can keep the bridle damp. Store the bit where it will not be knocked against other metal equipment.
Disinfect shared equipment carefully
Do not share bits casually between horses. If equipment must be shared, follow a veterinarian’s biosecurity directions. The American Association of Equine Practitioners advises cleaning shared equine equipment of organic debris and disinfecting between horses, followed by rinsing. Use only a disinfectant compatible with the bit’s material, follow its label, and rinse as directed before the next use.
A disinfectant is not a substitute for removing saliva and dirt first. Do not mix cleaning chemicals or apply a product that is not labeled for the intended surface. If a horse has a contagious illness or there is a barn outbreak, ask the veterinarian how to handle the bit, bridle, and other equipment. Keep each horse’s equipment clearly separated when possible.
Inspect the bit before putting it back on
After cleaning, run your fingers carefully along accessible surfaces and look at the bit in good light. Check for pits, sharp edges, deep scratches, flaking or peeling surfaces, cracks, corrosion, and rough patches. Pay special attention to joints and hollow areas where wear or residue may be less obvious.
Move each joint and ring gently. Look for a loose connection, excessive play, bent parts, a damaged mouthpiece, or a ring that no longer moves as designed. Check attached curb chains, straps, and connectors for rust, broken links, fraying, or sharp edges. Compare the bit with its original shape if a part appears bent.
Remove the bit from use if the mouthpiece is cracked, pitted, flaking, sharp, or rough, or if a ring or joint is damaged. Do not grind, file, or sand a mouthpiece smooth at home; that can leave an uneven surface and conceal structural wear. Ask a qualified tack professional or the manufacturer whether it can be safely repaired. Replace it if its condition cannot be confirmed. Make inspection part of routine tack checks, not just a response to a problem. Check again after a fall, a jammed bit, a drop onto hard ground, or unusual resistance during a ride.
Pay attention to the horse’s comfort
A bit can look intact and still be uncomfortable because of fit, mouth condition, or how it is used. Watch for new resistance, head tossing, gaping, excessive chewing, difficulty taking the bit, feed dropping, or sores at the mouth corners. These signs have several possible causes. Remove the bit and consult a veterinarian or qualified equine dental professional if the horse appears painful or develops an injury.
Do not change to a stronger or different bit to solve a behavior or balance issue without qualified guidance. A horse that feels heavy in the hand may need assessment of tack fit, training, soundness, and rider aids. A bit article can offer background, but it cannot diagnose the horse or determine the right equipment.
Frequently Asked Questions
How often should I clean a horse bit?
Rinse and wipe it after each use, then dry it fully. A deeper cleaning is needed when residue remains, using a method compatible with the material.
Can I use vinegar to remove stains from a bit?
Do not use vinegar unless the manufacturer confirms it is appropriate for that bit. Acidic cleaners may affect some materials or finishes.
Can I use a bit with dark discoloration?
Color alone does not confirm safety. Inspect for pits, flaking, cracks, roughness, or sharp edges, and ask a qualified professional if uncertain.
Should I share a bit between horses?
Avoid sharing when possible. If sharing is necessary, clean and disinfect it between horses according to veterinary biosecurity advice and product directions.
When should I replace a bit?
Stop using it if it has a crack, sharp or rough area, pitting, flaking, a bent part, or a damaged joint that cannot be verified as safe.
Final Words
Rinse off residue after riding, use only a material-compatible cleaner when water is not enough, and dry the bit completely. Inspect joints, rings, and the entire mouthpiece for defects before each use. Retire a bit with a crack, pit, sharp edge, or loose component until a qualified professional confirms it is safe. If you are looking into a bit for a horse heavy on the forehand, keep equipment questions separate from diagnosis and training decisions. A clean, sound bit supports routine care, while any sign of mouth pain deserves professional attention.